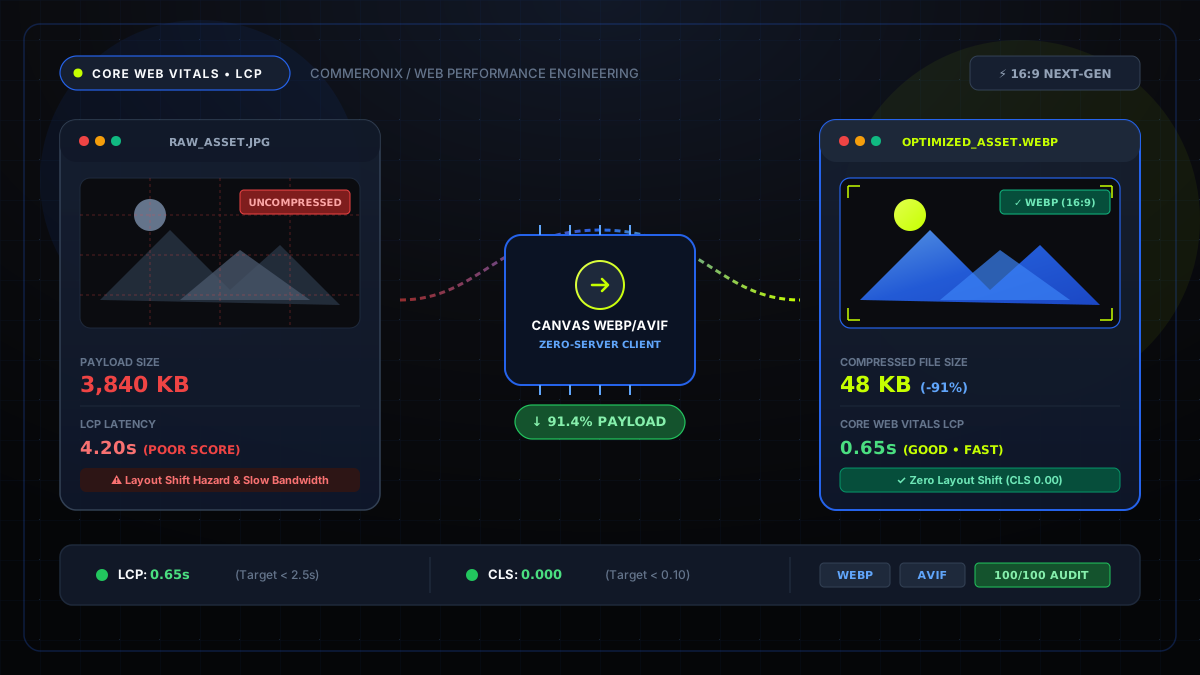
Key Performance Takeaway: Images account for an average of 48% of total webpage payload on content sites. By implementing modern WebP cross-conversion, client-side canvas compression, and explicit dimension tags, websites routinely see a 40%–65% reduction in page weight and score above 95 on Google PageSpeed Insights.
1. The Role of Images in Google Core Web Vitals (LCP & CLS)
Google evaluates user experience through its standardized Core Web Vitals metrics: Largest Contentful Paint (LCP), Interaction to Next Paint (INP), and Cumulative Layout Shift (CLS). Among these, LCP is most vulnerable to unoptimized media assets.
Largest Contentful Paint measures the exact render timestamp when the largest visible block—frequently a hero carousel banner, featured blog graphic, or e-commerce showcase photograph—is completely drawn inside the client viewport. Google requires an LCP of under 2.5 seconds for a "Good" rating. When mobile users on 4G or throttled cellular networks attempt to download uncompressed 4MB photographs, the browser download queue stalls, pushing LCP beyond 6 seconds and directly hurting organic search rankings.
Simultaneously, failing to declare fixed aspect ratios on media elements introduces Cumulative Layout Shift (CLS). When image dimensions are omitted, text content violently jumps downwards once the image file eventually finishes rendering, frustrating users and triggering search penalties.
2. Modern Format Architecture: WebP, AVIF, PNG, and JPEG
Choosing the correct file format is the foundational architectural decision in asset pipeline design. Historically, developers relied exclusively on JPEG for natural photography and PNG for transparency and diagrams. Today, modern codecs provide superior mathematical encoding:
- WebP: Introduced by Google, WebP utilizes predictive block coding based on the VP8 video codec. WebP delivers both lossy and lossless modes with native 8-bit alpha transparency. It achieves file sizes 25% to 35% smaller than comparable JPEGs without visible degradation.
- AVIF (AV1 Image File Format): Derived from the open-source AV1 video codec, AVIF offers exceptional compression efficiency for complex gradients and high dynamic range (HDR) assets.
- PNG (Portable Network Graphics): A purely lossless format. Ideal for logos, icons, and software user interfaces where razor-sharp line clarity is paramount. For general photography, however, PNG is excessively heavy.
- Legacy JPEG: Highly compatible across older devices, but lacks alpha channel transparency and exhibits ringing artifacts around high-contrast typography edges.
For instantaneous, client-side format conversion without uploading proprietary company photography to external cloud servers, you can utilize our dedicated Image Format Converter to convert legacy assets to WebP in a single click.
3. Lossy vs. Lossless Compression: Finding the Sweet Spot
Understanding the mathematical difference between lossy and lossless algorithms empowers developers to optimize assets aggressively without compromising visual aesthetics.
Lossless compression reorganizes image pixel dictionaries (similar to ZIP deflation) and strips extraneous EXIF metadata, camera serial numbers, and GPS tags. The decompressed image contains identical pixel values to the original, typically saving between 10% and 20% in file size.
Lossy compression, by contrast, removes high-frequency color variations that the human visual cortex cannot discern under normal viewing conditions. By targeting a quality setting of 75% to 80%, developers achieve a dramatic 60% to 80% reduction in bytes over the wire while maintaining pristine visual clarity.
Optimize your assets right now
Use Commeronix's client-side canvas engine to compress JPG, PNG, and WebP files with live savings preview.
4. Responsive Dimensions and Preventing Cumulative Layout Shift
One of the most frequent performance anti-patterns is serving a 4000×3000px camera photograph inside a desktop card container that only measures 400×300px on screen. The client browser is forced to download 12 million pixels, allocate excess memory buffers, and perform downsampling on the fly.
To eliminate this overhead:
- Resize assets to maximum display dimensions: Before publishing blog hero images, downscale the canvas to a maximum width of 1280px or 1920px using the Image Resizer Tool.
- Always specify width and height in HTML: Declaring
<img src="hero.webp" width="1200" height="675" />allows the browser engine to calculate the aspect ratio container immediately, preventing CLS layout shifts during page parse. - Apply native lazy loading: For images below the primary viewport fold, include
loading="lazy"anddecoding="async"to prioritize critical initial server assets.
5. Step-by-Step Optimization Workflow Using Commeronix Utilities
Follow this checklist for every image asset prior to production deployment:
- Step 1: Background Cleanup (If Needed): If your asset is a product photo with an uneven background, run it through the Background Remover Tool to produce a crisp transparent cutout.
- Step 2: Resize to Boundary Constraints: Scale the image down to your template's container specifications with the Image Resizer, locking the aspect ratio.
- Step 3: Convert to WebP: Convert legacy PNG or JPEG files into next-generation format via the Image Format Converter.
- Step 4: Canvas Compression: Pass the final WebP asset through the Image Compressor with a 75% quality slider to achieve optimal byte economy.
- Step 5: Inlining Micro Assets: For tiny UI icons (under 3KB), convert them directly into inline CSS backgrounds using the Image to Base64 Encoder to save HTTP requests.